Author Bridge Media Microsoft Word - PC Tutorials
HOW TO USE TRACKED CHANGES IN MICROSOFT WORD - PC
Tracked Changes is a tool in Microsoft Word that keeps track of the changes that you make to a document. If you are working with a ghostwriter or editor on your writing project, the Tracked Changes function will allow you to work together to make your project as strong as it can be.
This tutorial will show you how to turn Tracked Changes on and off, how to make a change, how to accept or reject a change, how to quickly accept or reject multiple changes, and how to accept or reject all changes in a document. It will also show you how to make comments in margins of the document, and how to delete comments that you no longer need.
How to Turn Tracked Changes On and Off
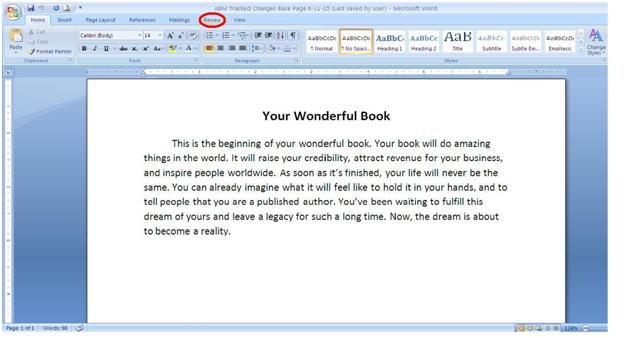
1. At the top of your Microsoft Word document, left click once on the Review tab to select it.
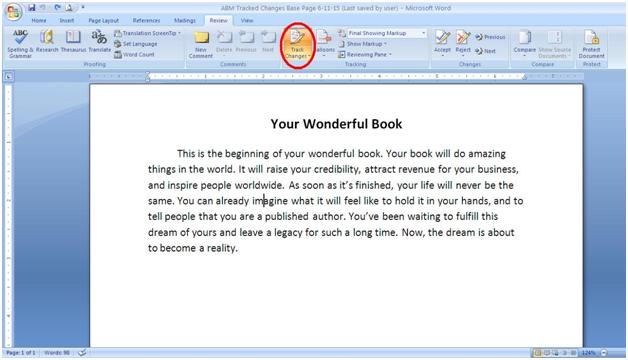
2. The Review bar brings up a bar of new buttons. From these, left click once on the Tracked Changes button to select it. The Tracked Changes button will turn orange. This indicates that Tracked Changes has been turned ON.
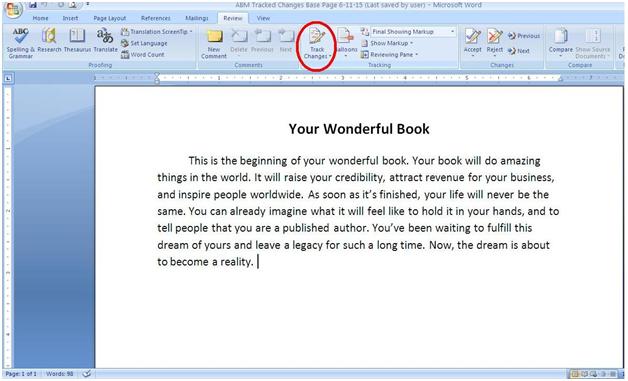
3. To turn off Tracked Changes, left click once on the Tracked Changes button again. The button will return to the same color as the rest of the bar. This indicates that Tracked Changes has been turned OFF.
How to Make a Change Using Tracked Changes
1. With the Review tab selected at the top of the document, left click once on the Tracked Changes button. The button will turn orange to indicate the Tracked Changes has been turned ON.
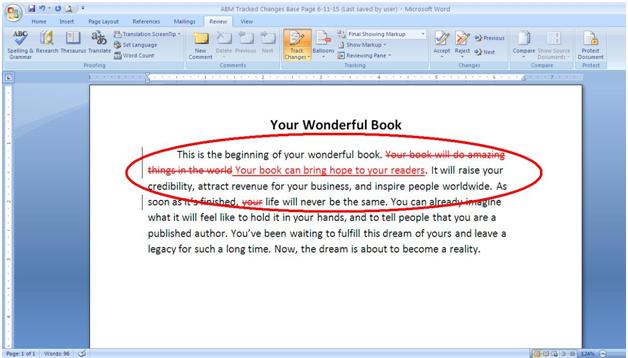
2. Click on the place in your text where you want to make a change, so that the regular cursor appears. Then, just type as you normally would. Your new text will appear underlined in a different-colored font. Any text you delete will be marked with a strikethrough and will also appear in the different-colored font.
How to Accept or Reject a Change Using Tracked Changes
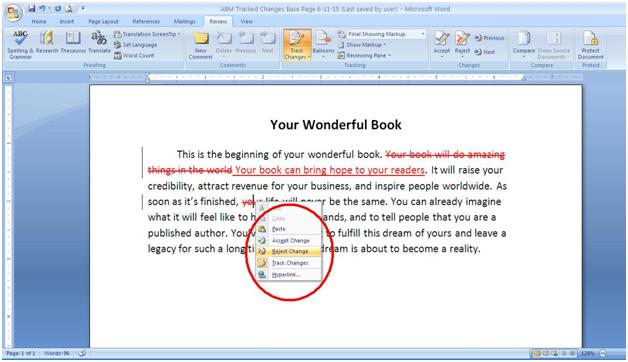
1. To accept a specific Tracked Change in your document, navigate your mouse over change, and right click once. This brings up a menu of options. Navigate down to "Accept Change" on the menu, and left click once. Once the change has been accepted, it will turn the same color as the rest of the text.

2. To reject a change, follow the same process. Navigate to the change you want to reject, and right click on it once. The same menu will appear. Left click once on "Reject Change" to reject the change. Once the change has been rejected, the text will revert back to its original form, before the change was made.
*Note: You can also accept or reject a change by highlighting the change with your cursor, then left clicking once on the "Accept" or "Reject" button on the bar at the top of the document, under the Review tab.
How to Accept or Reject Multiple Changes in a Document
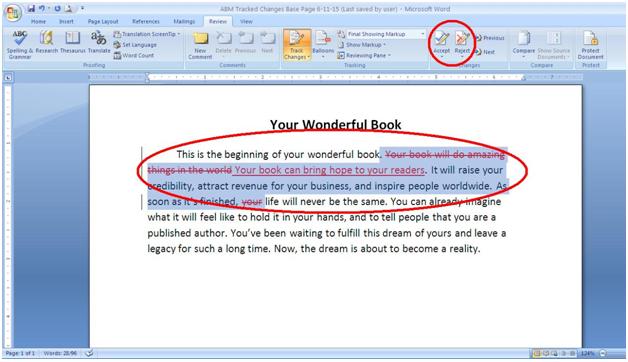
1. To accept or reject multiple changes in one consecutive stretch of the text, such as a sentence or paragraph, highlight the entire sentence or paragraph with your cursor. Then navigate to the "Accept" or "Reject"buttons on the bar at the top of the screen, under the Review tab. Left click once on the upper half of the button you need. This will accept or reject all changes in the selected text, depending on which button you click.
How to Accept or Reject All Changes in a Document
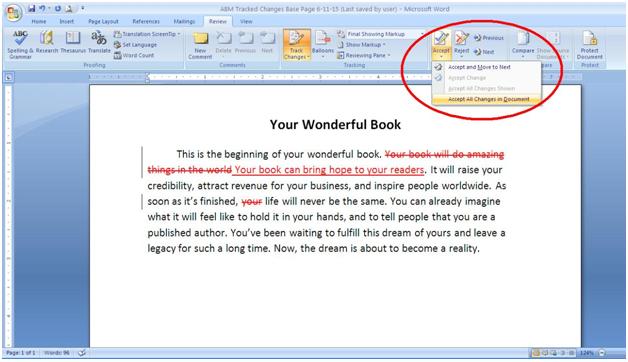
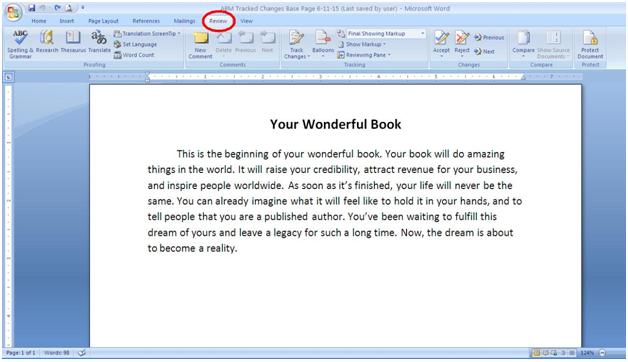
1. To accept all Tracked Changes in a document, make sure the Review tab is selected and navigate to the "Accept" button on the Review bar at the top of the screen. Left click once on the lower half of the button, where you see a small downward-pointing arrow. This brings up a menu. At the bottom of the menu, left click once on "Accept All Changes in Document." This will integrate all Tracked Changes into your document, and the text will return to its standard color. To reject all changes in the document, follow the same process using the "Reject" button instead.
HOW TO USE THE COMMENT FUNCTION IN MICROSOFT WORD - PC
The Comments function in Microsoft Word allows you to communicate with your ghostwriter or editor about specific things in your writing project that you have a question about or would like to change. Comments can help you make accurate progress and keep you and your editor on the same page as you are working together on your project.
This tutorial will show you how to add comments to your document, delete comments from your document, and make changes to comments that are already present in your document.
How to Add a Comment
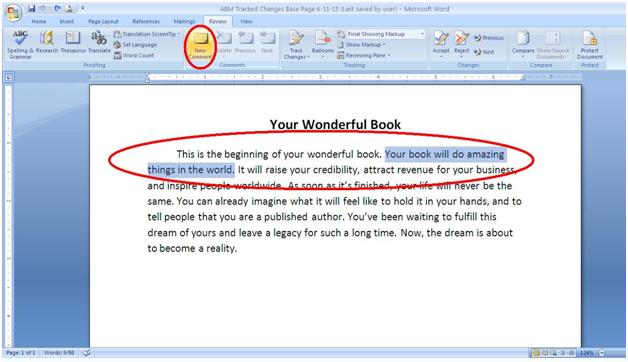
1. At the top of your Microsoft Word document, left click once on the Review tab to select it. This will bring up a new bar of buttons.
2. Using your cursor, select the part of the text that you would like to make a comment about. Then navigate your mouse to the "New Comment" button on the bar at the top of the screen. Left click once.
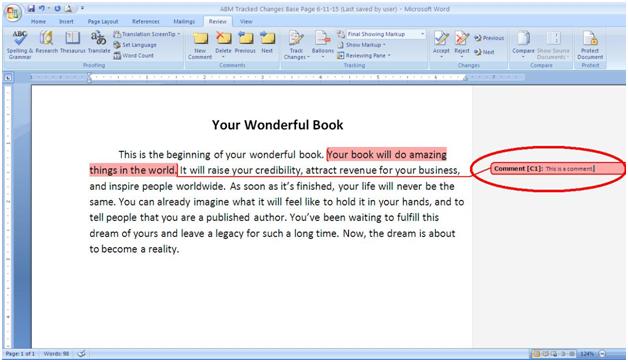
3. When you left click the "New Comment" button, the highlight on the selected text changes color, and a box appears in the right-hand margin of the screen. Left click once in this box to bring up the cursor, Then type your comment in the box.
How to Delete a Comment
1. Navigate to the comment you wish to delete. Right click once in the comment box. This will bring up a menu of options. Left click once on "Delete Comment." The comment will disappear from the margin.
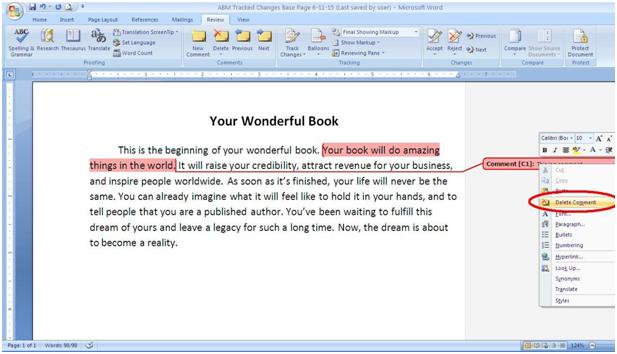
*When you right click in the comment box, be sure not to click on a word that is marked by a red or green spelling/grammar underline. If you do, it brings up a different menu, and you will not see the "Delete Comment" option from here. You can correct the misspelled or misused word if you need to. Then right click on the comment box again to bring up the proper menu.
How to Make Changes to a Preexisting Comment
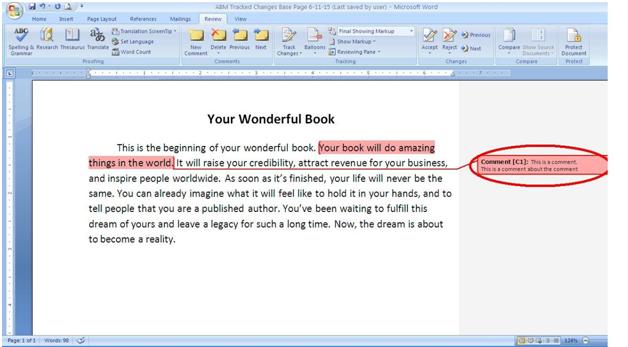
1. Navigate to the comment that you wish to edit. Left click once inside the comment box. This brings up your cursor. Type or edit or comment as necessary.
Get free tips to gain credibility, increase revenue and activate inspiration.
Your information is safe with us.


- © COPYRIGHT 2008-2025
- ALL RIGHTS RESERVED
- Confidentiality Policy